Refinishing your wooden windowsills can breathe new life into your home and add a fresh, clean look to your windows. Whether you’re dealing with old, chipped paint or simply want to update the colour, sanding and painting your windowsills is a manageable DIY project that can yield professional-looking results. In this guide, we’ll walk you through each step, from gathering your materials to applying the finishing touches, ensuring you have all the knowledge you need to tackle this project with confidence.
Key Takeaways
- Gather all essential tools and supplies before starting your project to ensure a smooth workflow.
- Use fine-grit sandpaper to create a smooth surface for the paint to adhere to, enhancing the final result.
- Apply primer with an angle brush to reach all nooks and crannies, and let it dry completely before painting.
- Choose high-quality paint and apply multiple coats for a durable and professional finish.
- Inspect for imperfections and touch-up edges to achieve a polished, flawless look.
Gathering Your Materials
Before you start sanding and painting your wooden windowsills, it’s crucial to gather all the necessary materials. Having the right tools and supplies will make the process smoother and more efficient.
Preparing the Windowsill
Cleaning the Surface
Before you start sanding or painting, it’s crucial to clean the surface of the windowsill. Use a mild detergent and water to remove any dirt, dust, or grime. Make sure the surface is completely dry before moving on to the next step.
Removing Old Paint
To achieve a smooth finish, remove the flaking original paint and ideally get down to the bare wood. The best way to do this is with a linbide scraper which you can pick up from most local hardware stores. An electric sander can also be useful for removing stubborn paint. Be thorough, as any remaining old paint can affect the new paint’s adhesion.
Taping Around the Area
Protect the surrounding areas by taping around the windowsill. Use a medium tack painter’s tape to cover the edges of the window frame and any nearby walls. This will ensure that you have clean lines and that paint doesn’t accidentally get on surfaces you don’t want to paint.
Proper preparation is key to a successful painting project. Taking the time to clean, scrape, and tape will make the painting process smoother and the results more professional.
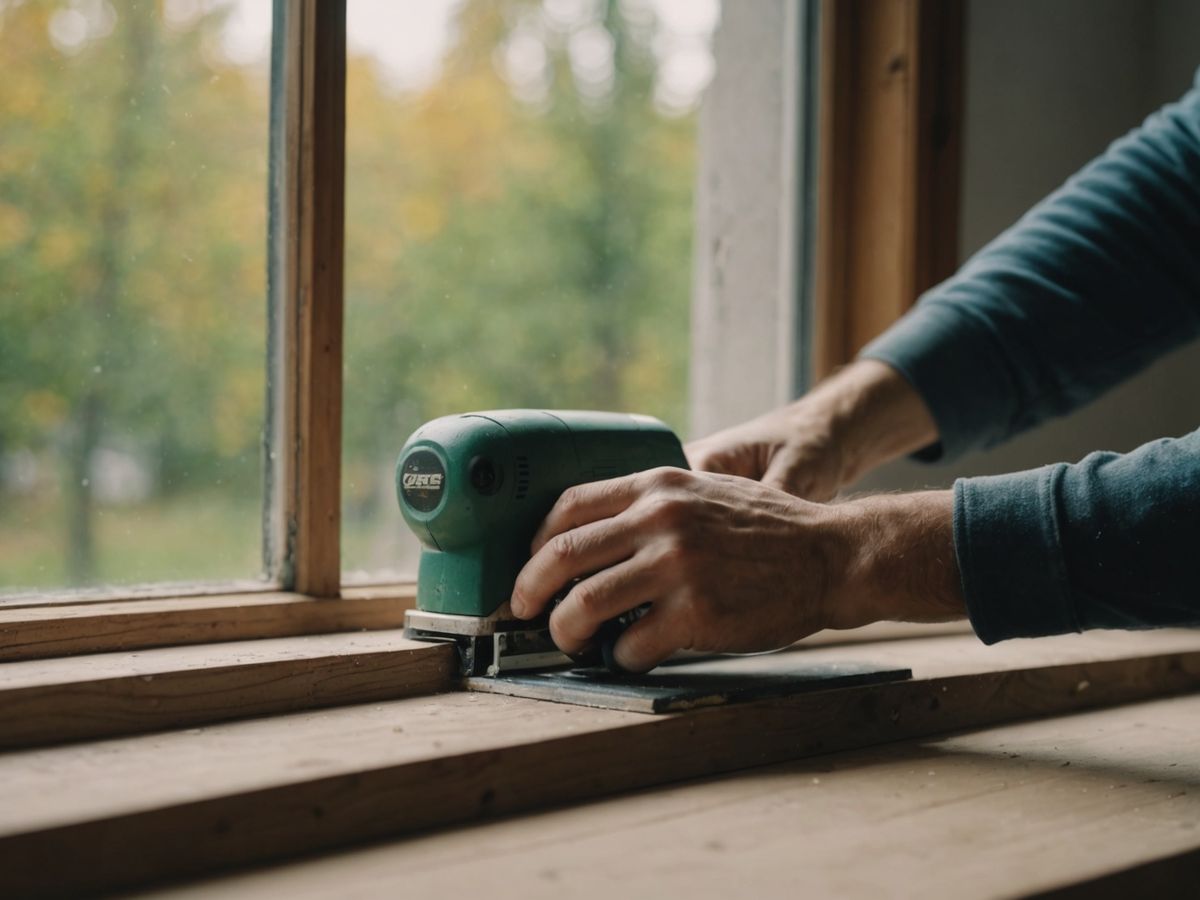
Sanding the Windowsill
Using Fine-Grit Sandpaper
After cleaning, it’s time to sand the surface. Take fine-grit 100-220 sandpaper and go over the entire windowsill. Your aim here is to create a smooth surface for the paint to stick to. Sanding will remove any old paint, smooth out imperfections, and provide a better surface for the new paint. Don’t rush through this; taking your time will pay off in the final result. Once done, wipe away any residue with a clean, dry cloth.
Sanding Techniques
Before sanding, use a paint scraper to remove any loose or peeling old paint from the window trim and windowsill. This will make sanding more efficient. We suggest starting with a coarse block when removing old varnish and then going to medium or fine grit depending on the condition of the wood. Wipe the windowsill in between sanding to ensure you can see exactly what you’re doing. We also recommend using wood putty or wood filler to fill in any imperfections such as nail holes in the wood trim, giving it the smoothest possible appearance. After the wood putty cures, you can sand any spots further before moving on.
Cleaning Up Residue
Once you’ve finished sanding, it’s crucial to clean up any residue. Use a clean, dry cloth to wipe down the entire windowsill. This step ensures that no dust or debris will interfere with the primer and paint application. A thorough cleaning will help you achieve a professional-looking finish.
Applying Primer
Once your windowsill is clean and smooth, it’s time to apply the primer. Primer serves as a base layer It also helps to block any stains on the wood from showing through the final paint coat. Use a brush or roller to apply the primer evenly, covering all areas. Make sure to let it dry fully before you start painting; consult the primer’s instructions for the recommended drying time.
Painting the Windowsill
Selecting the Right Paint
Choosing the appropriate paint is crucial for a long-lasting finish. Opt for a durable and easy-to-clean paint. Semi-gloss paint is often recommended for windowsills due to its resilience and ease of maintenance.
Applying the First Coat
Begin by pouring your paint into a manageable container, such as an old yogurt or sour cream container. This makes the job easier and allows you to save leftover paint for touch-ups. Use a fine brush to apply the first coat evenly, ensuring you cover all areas.
Adding Additional Coats
Allow the first coat to dry completely before applying additional coats. Typically, two to three coats are necessary for a smooth, even finish. Make sure to let each coat dry thoroughly to achieve the best results.
Painting window sills can be a bit tricky, but with patience and the right techniques, you can achieve a professional-looking finish.
Finishing Touches
Inspecting for Imperfections
After the paint has dried, carefully inspect the windowsill for any imperfections. Look for areas where the paint may have pooled or dripped, and check for any missed spots. If you find any, lightly sand the area and apply a touch-up coat of paint.
Touching Up Edges
Use a small, fine brush to touch up the edges and corners of the windowsill. This will help ensure a clean, professional finish. Pay special attention to the areas where the windowsill meets the wall or window frame.
Removing Tape
Once the paint is completely dry, gently remove the tape from around the windowsill. Pull the tape back on itself at a 45-degree angle to avoid peeling off any paint. If any paint has seeped under the tape, use a razor blade or a fine brush to clean up the edges.
Finishing touches: fill any nail holes with wood filler and sand them smooth once dry. Prime and paint or stain the trim as desired to match the room’s decor.
Conclusion
Refinishing your wooden windowsills can be a rewarding DIY project that not only enhances the aesthetic appeal of your home but also extends the life of your windows. By following the steps outlined in this guide—cleaning, sanding, priming, and painting—you can achieve professional-looking results without the need for expensive contractors.
Remember to take your time with each step, especially the sanding and priming, as these are crucial for a smooth and durable finish. With a little patience and the right materials, your windowsills will look as good as new, adding a fresh and polished touch to your living space.
Ready to work with a registered Master Painter? Get in touch with us today.
Quick Fire Questions
For sanding wooden windowsills, it’s best to use fine-grit sandpaper. This will help create a smooth surface for the paint to adhere to, without causing damage to the wood.
You can remove old paint from the windowsill using a paint scraper or a random orbital sander. Be sure to remove any loose or peeling paint before sanding the surface smooth.
Yes, applying primer before painting is essential. Primer helps the paint adhere better to the surface and provides a more durable finish. An angle brush is recommended for applying primer to get into the nooks and crannies.
Acrylic paint is a good choice for wooden windowsills as it provides a durable and smooth finish. Make sure to apply at least two coats for the best results.
It’s important to let each coat of paint dry completely before applying the next one. This usually takes about 4-6 hours, but drying times can vary based on the type of paint and the environmental conditions.
To ensure a smooth finish, sand the surface thoroughly before painting, use a high-quality brush, and apply multiple thin coats of paint. Inspect for imperfections between coats and sand lightly if necessary.